How Does the DrySign Aadhaar eSign Gateway Work?
How Does the DrySign Aadhaar eSign Gateway Work?
DrySign is an easy-to-use digital signature solution that uses your Aadhaar or PAN to authenticate your documents for you. In a document where multiple signatures are required, DrySign will easily fetch and authenticate the identities of all the signatories from government-authorized online services.
Currently, DrySign has an official partnership with eMudhra, a licensed Certifying Authority in India under the Controller of Certifying Authorities (CCA), Government of India. This means that whenever you sign a document using DrySign, a unique hash value is embedded permanently in the document by eMudhra, making that document legal and authentic – even more authentic than a simple paper-based signature! We chose eMudhra because their services are trusted by some of the biggest brands in India like Infosys, IBM, Kotak Mahindra Bank, IDBI Bank, and many more.
This blog will take you step-by-step through the process of signing using DrySign. At the end of the read, you will know precisely how the DrySign Aadhaar eSign Gateway works.
Requirements to perform a digital signature with DrySign:
- A computer or laptop
- A reliable internet connection
- Document/s that needs a digital signature
- A web browser, preferably Google Chrome
- A PDF reader, preferably Adobe Acrobat Reader
- A verified, registered account with eMudhra
Step 1: Go to https://drysign.exelatech.in/ and click on the “Sign In” button in the top right corner.

Step 2: On the sign-in page, enter your “User ID” & “Password” and then click on “Sign In”. You can also click on the “Sign in with Google” button below the sign-in button to sign in using your Google account.

Step 3: Once signed in successfully, you will see the main dashboard of the DrySign application. In the top-left section of the dashboard, click on the “Self Sign” option to upload and sign your document. If multiple signatories are required to sign the same document, click on the “Group Sign” option.

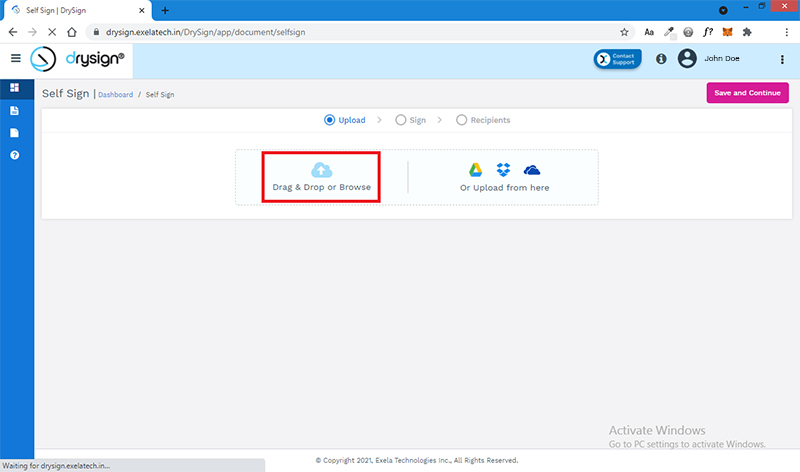
Step 4: On the next page, select the “Drag & Drop or Browse” option to select the document (which needs to be signed) from your computer. You can also use Google Drive, Dropbox, or OneDrive to select your document. Next, click on the “Save and Continue” button at the top right section of your screen to continue.
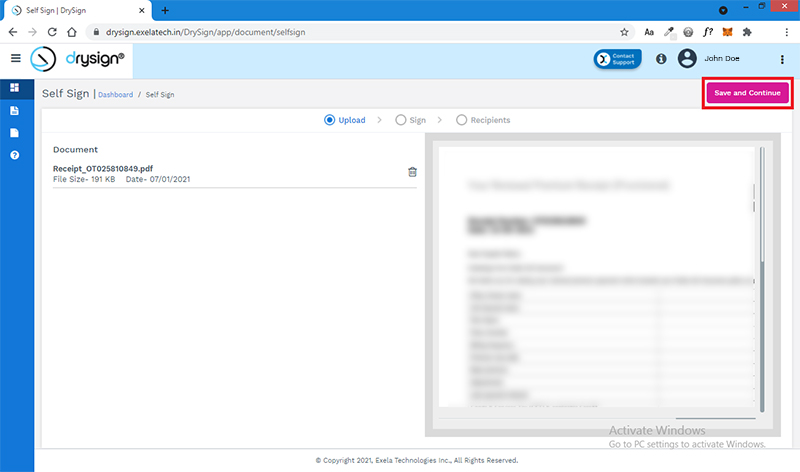
Step 5: Once the document is selected, you can preview it to verify if it’s the correct document that needs the signature/s. After verification, click on the “Save and Continue” button at the top right section of your screen to continue.
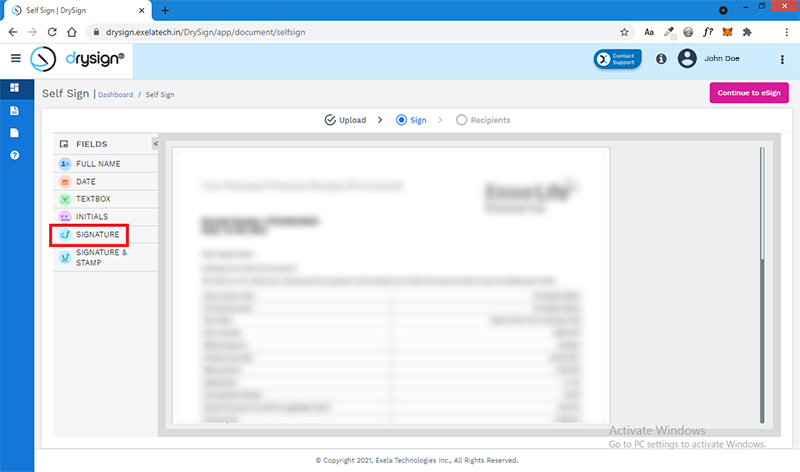
Step 6: On the next page, you will use the “SIGNATURE” button in the left panel of the screen to drag and drop onto any location on your document on the right. You may also drag and drop other elements like “DATE” and “FULL NAME” on your document if needed.
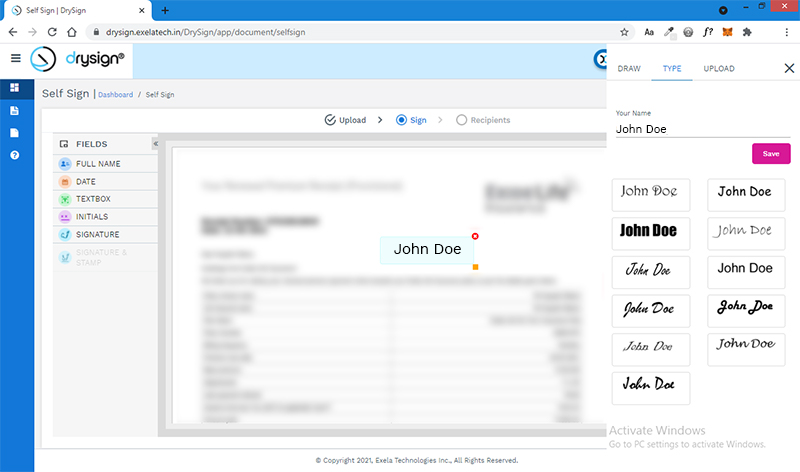
Step 7: After dropping the signature on the document, you can customize the visuals as per your liking from the right panel of your screen. You also have the option to draw or upload your custom signature for placement on the document.
Also read: FAQs – Digital Signatures in India
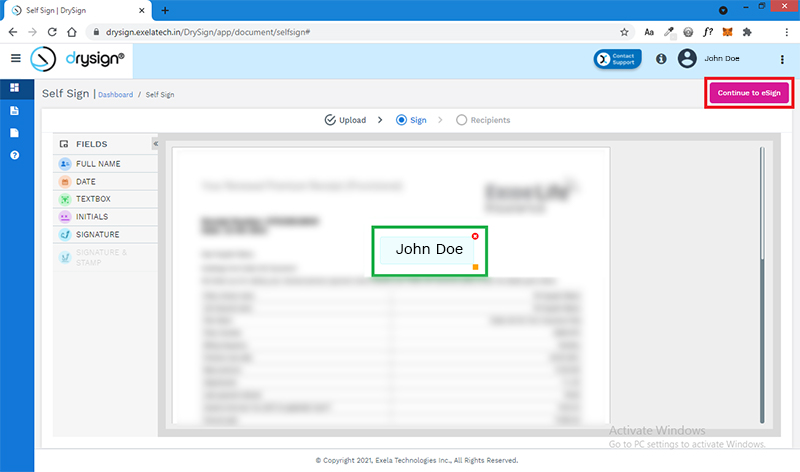
Step 8: After customizing the visuals, click on the “Continue to eSign” button at the top-right section of the screen.
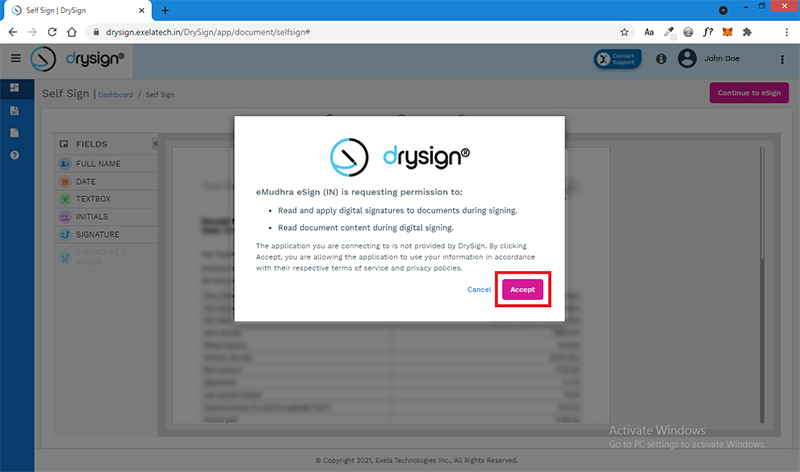
Step 9: After clicking the button, a pop-up will appear, asking you for your permission. Read the contents in the pop-up and then click on the “Accept” button to continue. On clicking the accept button, you will be redirected to the eMudhra portal.
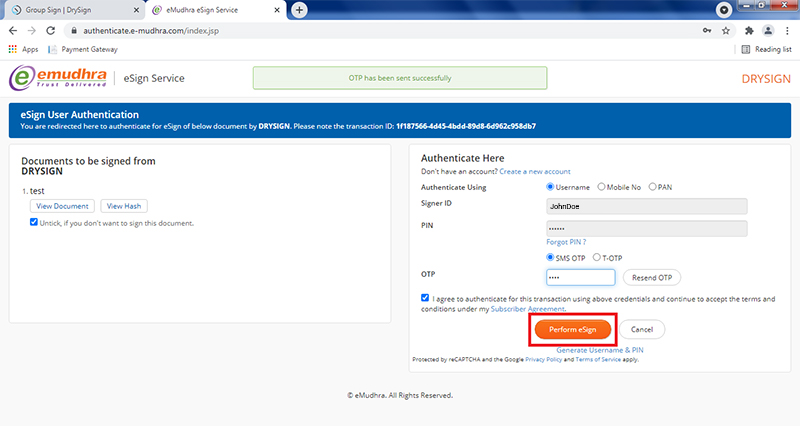
Step 10: Once the eMudhra page loads, you can click on the “Create a new account” link (black rectangle) if you have never registered with eMudhra before. You can complete the registration process separately and come back to this page when done. If you are already a registered user on eMudhra, simply enter your login details to receive an OTP.
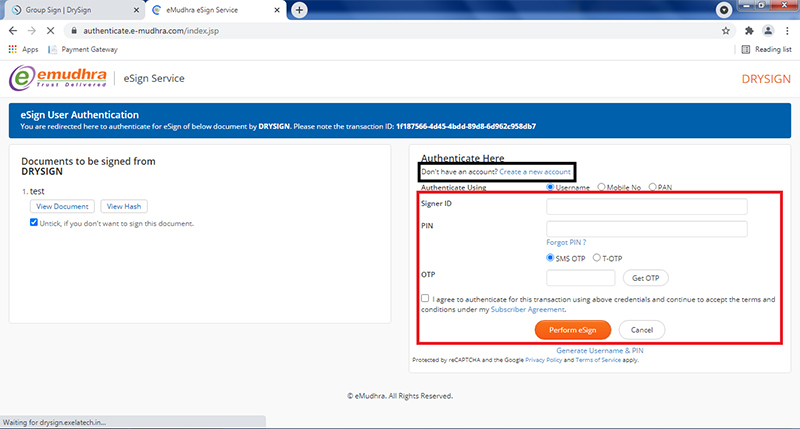
Step 11: Once you enter the OTP, you can click on the “Perform eSign” button to authenticate your signature.
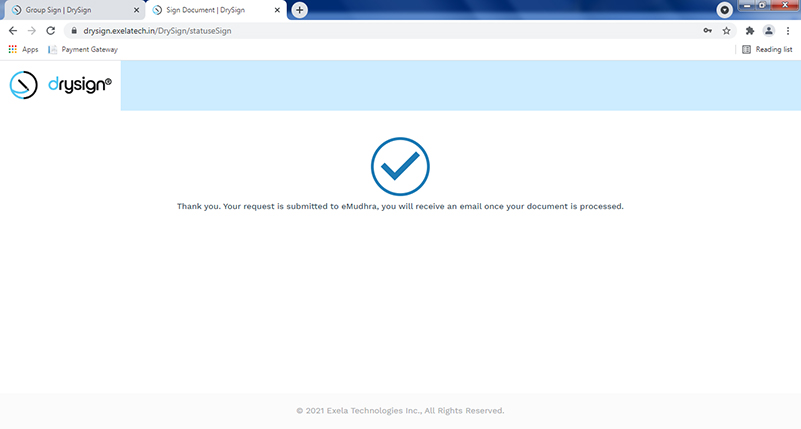
Step 12: You will receive a confirmation message once the signature is complete.
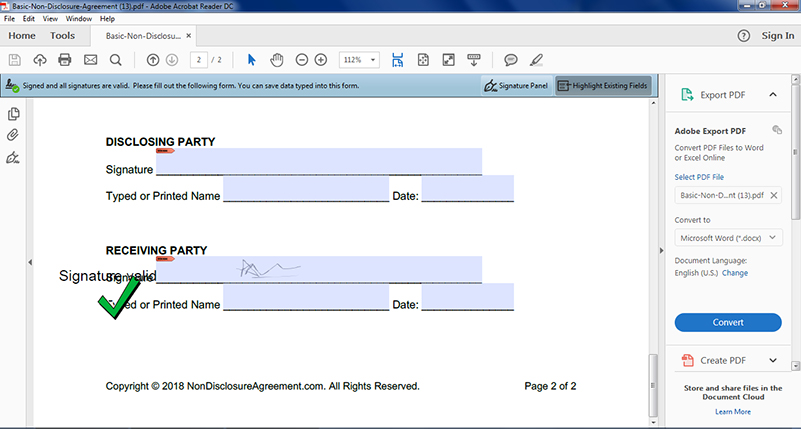
Step 13: After you open your signed document, you will see a big green tick mark on the document, which acts as a visual confirmation of authentication.
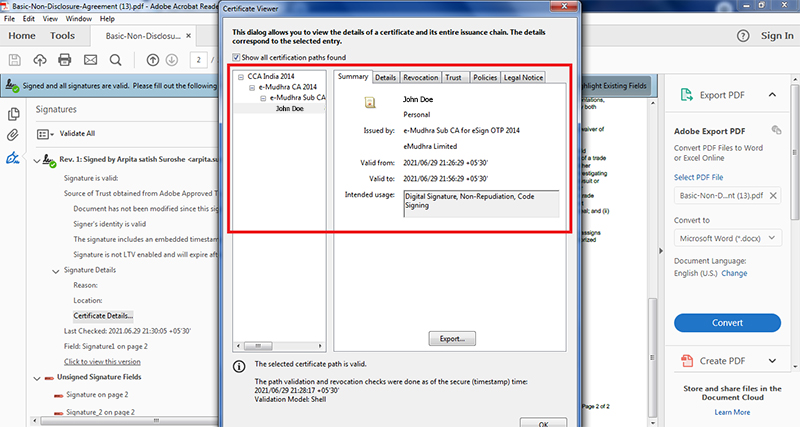
Step 14: If you want further confirmation, you can view the certificate details in Adobe Acrobat PDF Reader, which proves the complete authenticity of the document.
This is how DrySign uses eMudhra as a trusted gateway to help individuals and businesses eSign safely and effortlessly using Aadhaar or PAN. Try out all the premium features of DrySign for free today!
Found this interesting? Share on your socials to let others know:
